Scan the Negative,
or a
Print?
|
As can be seen in illustration #3
below, as scanner technology approaches
5,000 samples per inch and prices reach
down into the "home darkroom" range,
scanning the negative will become the
process of choice. BUT, the results
WILL differ
and scanning a print will most
likely yield expressively different
results. Pixel count will soon be
irrelevant to the argument, leaving only
expressive considerations.
The new 2400 spi Epson 2450, with built
in "Cold Light" transparency adapter for
4x5, will rattle a few cages.
|
Arguments for scanning the negative, rather than a
print, generally include the following:
- Negatives have a greater dynamic range
than prints.
- This is certainly the case, BUT, as is
shown in the discussion on density range, the
negative scanner compresses and distorts the
tonal range, as does photographic paper.
Flatbed scanners, with their bright, direct
illumination, tend to "see into" the shadows
of photographic silver prints, seeming to
increase the apparent range.
- The print is a secondary source, thus
information is lost in the translation.
- Certainly true, IF the negative and print
are of the same size (see below).
- Perhaps the loss of some grain, dust, and
scratches is not a liability. If the optical
print is first rate and large enough, it can
provide a superior tonal balance. Indeed, the
making of a "corrected" print can make
available information that cannot be isolated
by the transparency scanner. Loss of detail ,
if present, can be minimal.
- Negative scanners render colors more
accurately than flatbed scanners.
- Certainly true in my experience.
- The print is subject to degradation from
the optical system used to make it.
- The scan also is subject to degradation
from the optical system used to make it
- Print detail can be a function of the
paper used.
- Certainly true, however the use of glossy
RC paper, which is then polished with paste
wax, provides an excellent platform.
- Negative scanning eliminates the cost of
maintaining a traditional opto-chemical
darkroom.
- At present, the cost of negative scanners
is 5 to 6 times that of flatbed scanners, and
perhaps similar to that of a basic, good
quality, traditional darkroom. If one does
not already have a darkroom, this argument
has merit.
- Negative scanning is the most convenient
method of converting photographic data to a
viewable form.
- No question about it, and the best
argument for acquiring a negative scanner.
Consider scanning a standard 3.5"x5" print,
available from a photofinishing lab, with a flatbed
scanner. Scanning such a print at 600ppi (within
the capacity of current "under $300" scanners)
yields the same pixel count as scanning a Minox
negative at 6927ppi (impossible at this time) or a
35mm negative at 2223 (roughly the resolution of a
PhotoCD).
In the case of a 35mm, or larger negative,
arguments 2 and 3 above are certainly valid, but
for the Minox negative, scanning a print is an
attractive option.
|
|
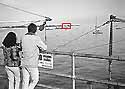
The enlargements below were made from
the area, outlined in red, of the Minox
image shown, full frame, at the right. The
selected area, of the Kiaora, measures 71
pixels of the 1171 total pixel width of
the 11mm Minox negative - roughly 0.67mm
on the negative.
|
|
|
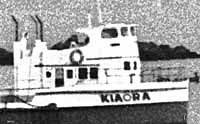
#1 - from a scan
of -
Silver Print
16 x 20 inch
600spi, HP 3c flatbed scanner
8370 x 12000 pixels
99.8 MB file
To achieve this same pixel density, a
Minox negative would need to be scanned at
30,480 samples per inch Such a file would
yield enough information to print a 32x44
inch print on a machine requiring source
files of 300 pixels per inch.
|
|

|
#2 - from a
scan of -
Minox Negative
8 x 11mm
2,700spi, Nikon LS-1000
850 x 1169 pixels
0.971 MB file
Each pixel in this image is represented
by more than 10 pixels in image #1 above.
It is evident that, for small
negatives, any defects in the optical
enlargement system are completely offset
by the lower pixel count of the negative
scan. As digitizing technology improves,
the gap will narrow - as shown below
|
|
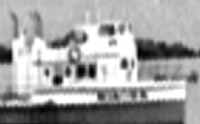
The effectiveness of interpolation can
be assessed by the image at the right
which is from the Minox negative scan
#2 above. The file
size was increased to equal that of the
"16x20" print scan shown directly above.
It is clear that increasing the file size
(pixel count) simply forces the software
to increase the number of pixels
representing the same amount of
information. Just as with the photographic
negative, the initial data capture
establishes the maximum information
available for output.
|
|
|
|
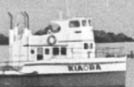
Image #1,
resized with Photoshop to an image size of
8mm x 11mm and a pixel count of 5,000
pixels per inch. This SHOULD yield a
result similar to scanning the original
negative with a 5.000 spi transparency
scanner as #3 shown
below.
|
|
|
#3 - from an
ePixel.com scan of
-
Minox Negative
8 x 11mm
5,000 spi, Fuji Frontier. Resampled up to
a density of 10,000 ppi by the
Frontier
1575 x 2165 pixels
3.26 MB file
When the negative is scanned, the final
print size is entered and the sampling
rate is calculated to provide the optimum
resolution for the Fuji Frontier printer.
If the required pixel density exceeds the
optical sampling rate of the scanner, the
image is resampled upward to the required
pixel count.
The quality and detail are remarkable,
yielding a 10 x 15 inch print which is
unsurpassed in visual quality, and
accutance - practically eliminating the
need for this discussion.
|
|
|
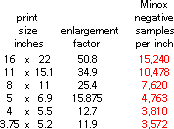
Assuming the nominal 300 ppi for
quality printing, the various print sizes
and the required
scanning densities are shown. To
create a 300 ppi file for a 16x22 inch
print (a 50.8 x enlargement) the Minox
negative must be scanned at (or resampled
up to)15,240 pixels per inch.
BUT
A lot depends on the software used by
the scanner AND the algorithm used by the
printer. Both, for the Fuji Frontier,
appear to be remarkable as shown by
results from ePixel.
|
|
|
|
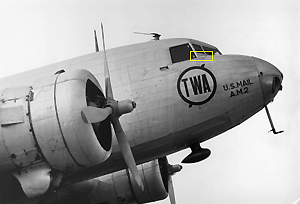
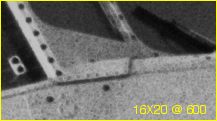
The 16 x 20 inch print
(actually 13.2"x19.4") was made
on Ilford Multigrade RC paper and
scanned at 600 samples per inch
to provide an 87.9 MB file. No
sharpening was done.
The enlargements below were
made from the area, outlined in
yellow
|
|
Douglas
DC-2
Clover Field, Santa
Monica, California, c.1985
Minox IIIs, Kodak High Contrast Copy
Film
|
|
|
The 13.2"x19.4" print provided
a 44.7964x enlargement,
equivalent to scanning the
negative at 26,878 samples per
inch. Print size limited only by
the quality of the film and skill
of the photographer.
|
|
|
|
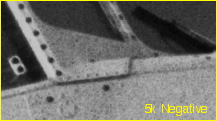
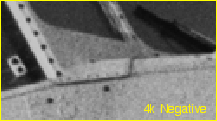
Pixel count reduced to
simulate scanning the negative at
5,000 samples per inch. Although
1/5th the information, still
adequate for 5x7 or, with good
printer software, 8x10 inch
prints.
|
|
|
|
Pixel count reduced to
simulate scanning the negative at
4,000 samples per inch. Still
good information for top quality
prints to 5x7 inches.
|
|
|
|
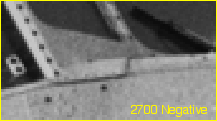
Pixel count reduced to
simulate scanning the negative at
2,700 samples per inch.
|
|
|